Top Food Blogs
Showing posts with label Cheese. Show all posts

Sunday, 16 June 2013

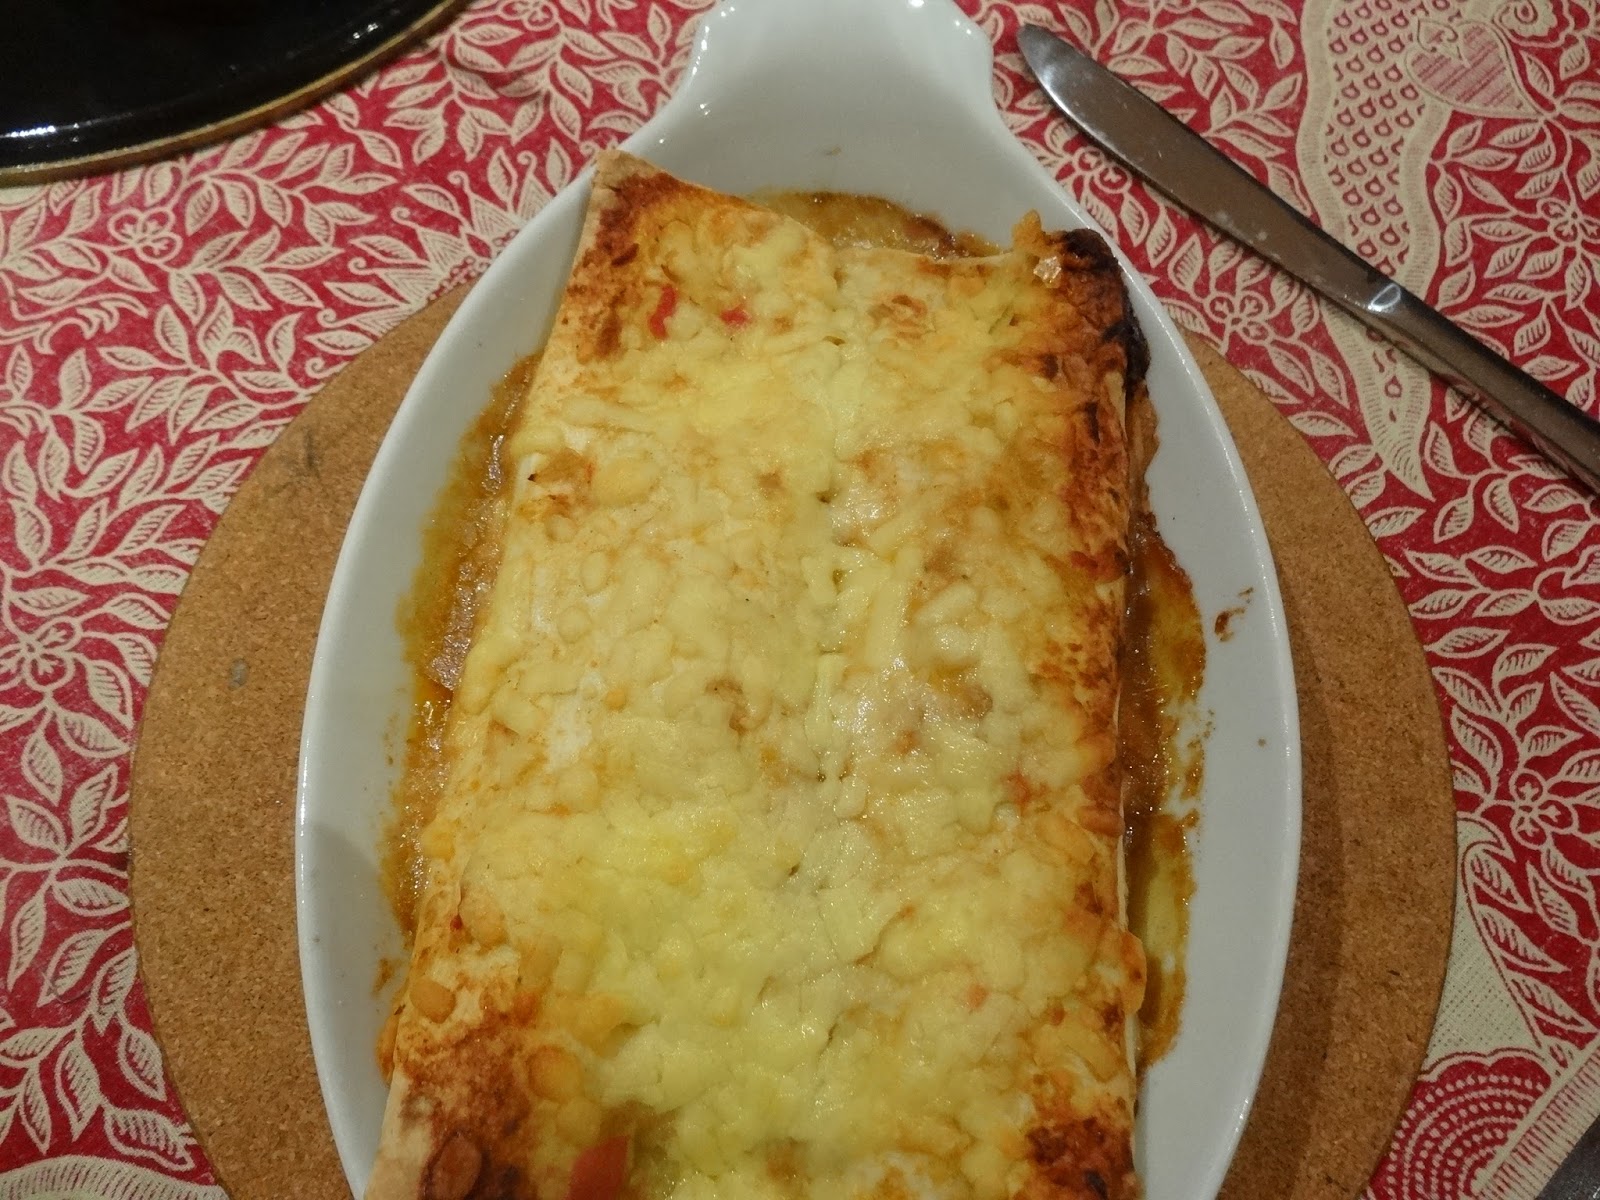
Chicken and Green Olive Enchiladas

I have just returned from my sister Philippa's 50th Birthday, which we celebrated in style at the fabulous Il Centro at Eagle Street Pier in Brisbane.  A lovely group of girls, daughters, sisters, sisters in laws and mother with life long friends. The sun was shining, the weather was glorious and it was a wonderfully memorable day.  The food is always beautiful and  the service impeccable .  The event didn't end there we moved across to Mr & Mrs G's and continued on into the evening.
I also managed to get a copy of Marcia Georges cookbook Greek by Heritage Italian by Heart. The book shares with readers the recipes from her parents restaurants and all that have made  Marcia and Andy Georges Il Centro famous for 21 years. All royalties go to  Cancer and Bowel Research Trust and you can get the book on line.
Well after wining and dining in Brisbane for a few days, I came home to a hoard of hungry boys staying here, Rugby again and 21st birthdays. Always a challenge to fill them up, they requested Mexican ! They love it and it does seem to do the trick, for a few hours at least. I decided to do these Chicken and Green Olive Enchiladas. A meal I haven't cooked for years. A long way from the absolutely stunning Sand Crab Lasagna of Il Centro, but far more affordable when feeding a crowd of young men.


1-2 kilos of chicken thighs
6 cups chicken stock
3-4 tablespoon Rylstone Olive Oil
1 cup stuffed green olives sliced
2 cups finely chopped onions
1 large fresh tomato or 2 small ones chopped
3 tablespoons chopped garlic or about 3 cloves
1 teaspoon ground cumin
1/4 teaspoon cinnamon
2 tablespoons chilli powder ( you can add up to 5, or you may find it is better to start with only 1 and increase once the chicken is cooked
3 tablespoons plain flour
500 grams shredded pizza cheese 


Place the chicken thighs and the 6 cups of stock in a large saucepan and simmer until cooked. This should take about 20 minutes. Cool the chicken in the stock.
Shred the chicken coarsely and transfer to a large bowl.
Heat 3 tablespoons of olive oil in a fry pan over a medium heat. Add 1 cup of the chopped onion, tomato, garlic cumin and cinnamon. Cook until onion and tomato are quite tender, stirring occasionally. This may take 10 minutes. Add the chilli powder and flour and stir for about 2 minutes. Gradually whisk in the 6 cups of stock a little at a time to incorporate the roux. Increase the heat and simmer until reduced to about 3 cups, stirring occasionally. All of these steps can be done the day before or the morning of.
Mix 1 cup of the sauce into the chicken.
Spread a thin layer of the sauce in the baking dish you are going to cook them in. You can line them all up in 1 or 2 big ceramic baking dishes or individual dishes, if you choose.
Arrange the tortillas on a work surface and place about 3 tablespoons of cheese in the centre of each, followed by1 tablespoon of the chopped onion and about 1/4 to 1/3 cup of chicken along the top .
Roll up as tightly as you can and place seam side down in your baking dish. Repeat with remaining tortillas.
Preheat the oven to 175C.
When finished pour remaining sauce over them and sprinkle with more of the grated cheese.
Cover with foil and bake for 20 minutes. Remove foil and bake a further 10 minutes or until sauce bubbles.
Remove the foil and let rest for another 5- 10 minutes as they are very hot, before serving
Serve with sour cream and watch them disappear.


Tortillas, Olives Shredded Chicken and Chopped Onion


A small amount of sauce in the bottom of your baking dish


Place cheese onion olives and chicken in the centre of the tortilla.


Finished enchiladas.


Tuesday, 7 August 2012

Creamy Cauliflower Soup with Celery and Blue Cheese

Cauliflower are plentiful right now, and very inexpensive.
I just love a cauliflower cheese with my roast lamb in winter. It's a childhood memory, perhaps we didn't even like cauliflower then and this is the way our mothers got us to eat it. Not everyone in my household does like it, but funnily enough they do love this soup. Sometimes, it is not necessarily the young ones who object either ! Just don't tell them what the main ingredient is until after they have finished. I guess if you don't like blue cheese give it a good dose of parmesan or romano or as an alternative some chopped walnuts are a yummy addition at serving time.
It is a simple family soup, that is smart enough for dinner guests with its garnish.
Did you know, when cooking cauliflower if you cook it in milk, with a piece of bread in the saucepan it will stay really white ? !!! ( one of those Nanna tips )

1 whole  medium size cauliflower, broken up into small florets
1/4 bunch celery, sliced
2 onions, peeled and sliced
4 garlic cloves, peeled and chopped
1 large potato peeled and cut into 8
chopped chives for garnish
blue cheese or walnuts
1.5 litres good strong chicken stock
100 grams butter
Cream approx 400 mls or half cream /milk
S&P


In a large saucepan, saute the onions, garlic and celery in the butter until soft.
Add the potato and cauliflower florets and the chicken stock.
Cook until the cauliflower is soft. Cool and puree in a blender or with a handheld device in the saucepan. Check for seasoning  and beware, some chicken stocks, if not homemade can be very salty. The cheese is also salty. You can now add about 400 mls cream, which makes it very creamy OR wait till serving time which is what I do and only add a small amount.
Plate the soup, add a dollop of cream and crumbled blue cheese and the chopped chives.
Let your diners stir through the cream and the cheese. Yummm !


Thursday, 5 July 2012

Baked Ricotta with Pita Toasts

This easy fabulous dish is always a winner. We had a big family birthday dinner here last night for 12 and I served this with drinks beforehand. I made some pita toasts and grilled some eggplant and zucchini and threw some sun dried tomatoes on the plate as well. Very tasty but light enough not to spoil the main meal. The ricotta can be made a day ahead and keeps for a couple of days, well covered of course!
The pita toasts always get people talking! What are these ? How do you make them?  I will let you in on the secret, for those who don't already know! I have been making them forever and prefer them to most biscuits on a cheese or anti pasta platter. They are also great with soups and dips, or just by themselves. Years ago some food companies were making them and selling them in very appealing packaging...... but I have to say, not quite the same! They are so inexpensive as well, just be sure you are spending time in the kitchen when you set about baking them. The slightest distraction and you can   end up throwing trays of burnt toasts in the garbage ! These can also be made well ahead, as long as everyone doesn't eat them beforehand!!


Baked Ricotta


750 grams Ricotta cheese
3 egg yolks
150 grams grated Parmesan cheese
1/2 cups freshly mixed chopped herbs like basil, parsley and chives are always good and easily found
You may also use fresh oregano, lemon thyme, or sage
Salt and pepper
1 tablespoon ground cumin
Rylstone olive oil to drizzle over the top


Place the ricotta in a bowl and mix in the egg yolks and parmesan, until combined. Add salt and pepper, to taste
Line an 8" round cake tin with glad bake , bottom and sides.
Place half the ricotta mixture in the cake tin and smooth over with the back of a spoon. Scatter the mixed herbs over the top and then layer the remaining ricotta over the herbs smoothing the surface. Sprinkle with the ground cumin and drizzle with the olive oil.
Boil some water.
Place the cake tin in a baking tray and fill with the boiled water to half way up the sides of the tin.
Bake in a 160C oven for 50 minutes.


Pita Toasts

1 packet large Lebanese pita bread with pockets
butter for spreading
salt
the topping is entirely up to you experiment
examples
dried tarragon or oregano, thyme
Herbies, Masterfood , McCormick's all do an amazing array of blended spices, like Family Friendly, All Purpose Seasoning, Moroccan, Lemon Pepper. I also use a Merquen seasoning which my good friend Louise brings me from Santiago. Slightly spicy it is on most tables in South America as a condiment as we would have salt and pepper! Basically there are no rules, experiment and see what you like. It must not be too much, to overpower the accompaniments you are serving it with.


Preheat oven to 175C.
Tear the pita pockets at the join so each pocket is now two pieces. Butter the pieces and sprinkle with your preferred seasoning, if you are using dried herbs spread them into the pita with the butter as they will fall off once baked. Sprinkle with salt and cut into small wedges, as you would a cake. I layer them, cut in half, then quarters, then eights. Don't worry if they are uneven in size or slightly ripped and torn. This all adds to their charm.
Place as many as can fit on oven trays and place multiple trays in the oven if you have a fan forced and cook for 6 minutes. Do not leave the kitchen and put a timer on! Store in well sealed plastic containers until ready to serve.